Slope is a WooCommerce compatible theme, which means that in order to have the e-commerce functionality, you will need to install and activate the latest WooCommerce plugin.
We are not going to cover any in-depth Woo-Commerce related topics, since you can easily find the related documentation at the official plugin page here. However, we are going to go through a very quick introduction on how to create Categories and Products for your store. Let’s get started.
Setting up Product categories
Setting up product categories is easy. As it happens with posts, products too can be assigned to categories and subcategories. Provided that you have installed the WooCommerce plugin, navigate to Products > Categories. You will see the following screen:
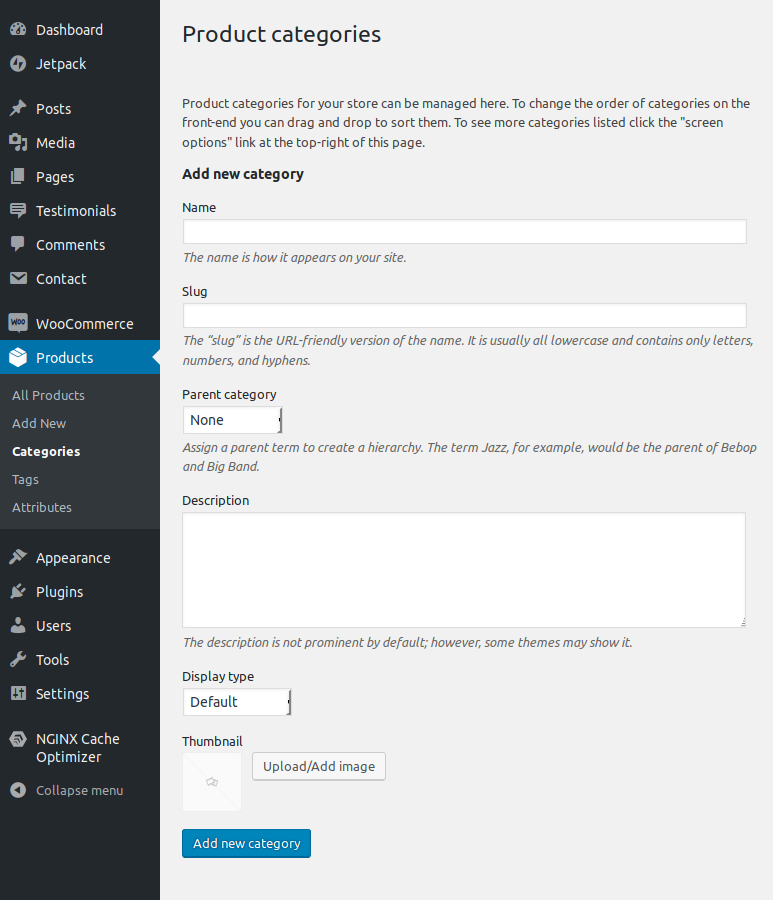
The page comes with inline help, so you will not have trouble to figure out how things work.
Display Type
Let’s pay attention at the “Display type” dropdown. You have 3 options there:
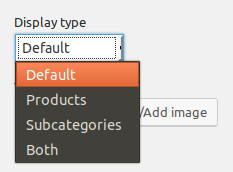
- Default will grab the values set at WooCommerce>Settings>Products>Displaytab .
- Categories will show only products on the category pages.
- Sub categories will show a list of subcategories and the number of products at each one of them.
- Both will show both the subcategories links at the top and the products right below.
Thumbnail

Here you can assign an image to each category. For the scenario that you choose to also show subcategories to your category page, the theme will use these images assigned here as your category images.
Quickly Set up a Product
Setting up a product store in WooCommerce is easy as some button clicks. We’ve already seen how a product category can be created now to create a product follow the steps below and you’ll be up & running in no time.
Steps to Create & Publish a Product
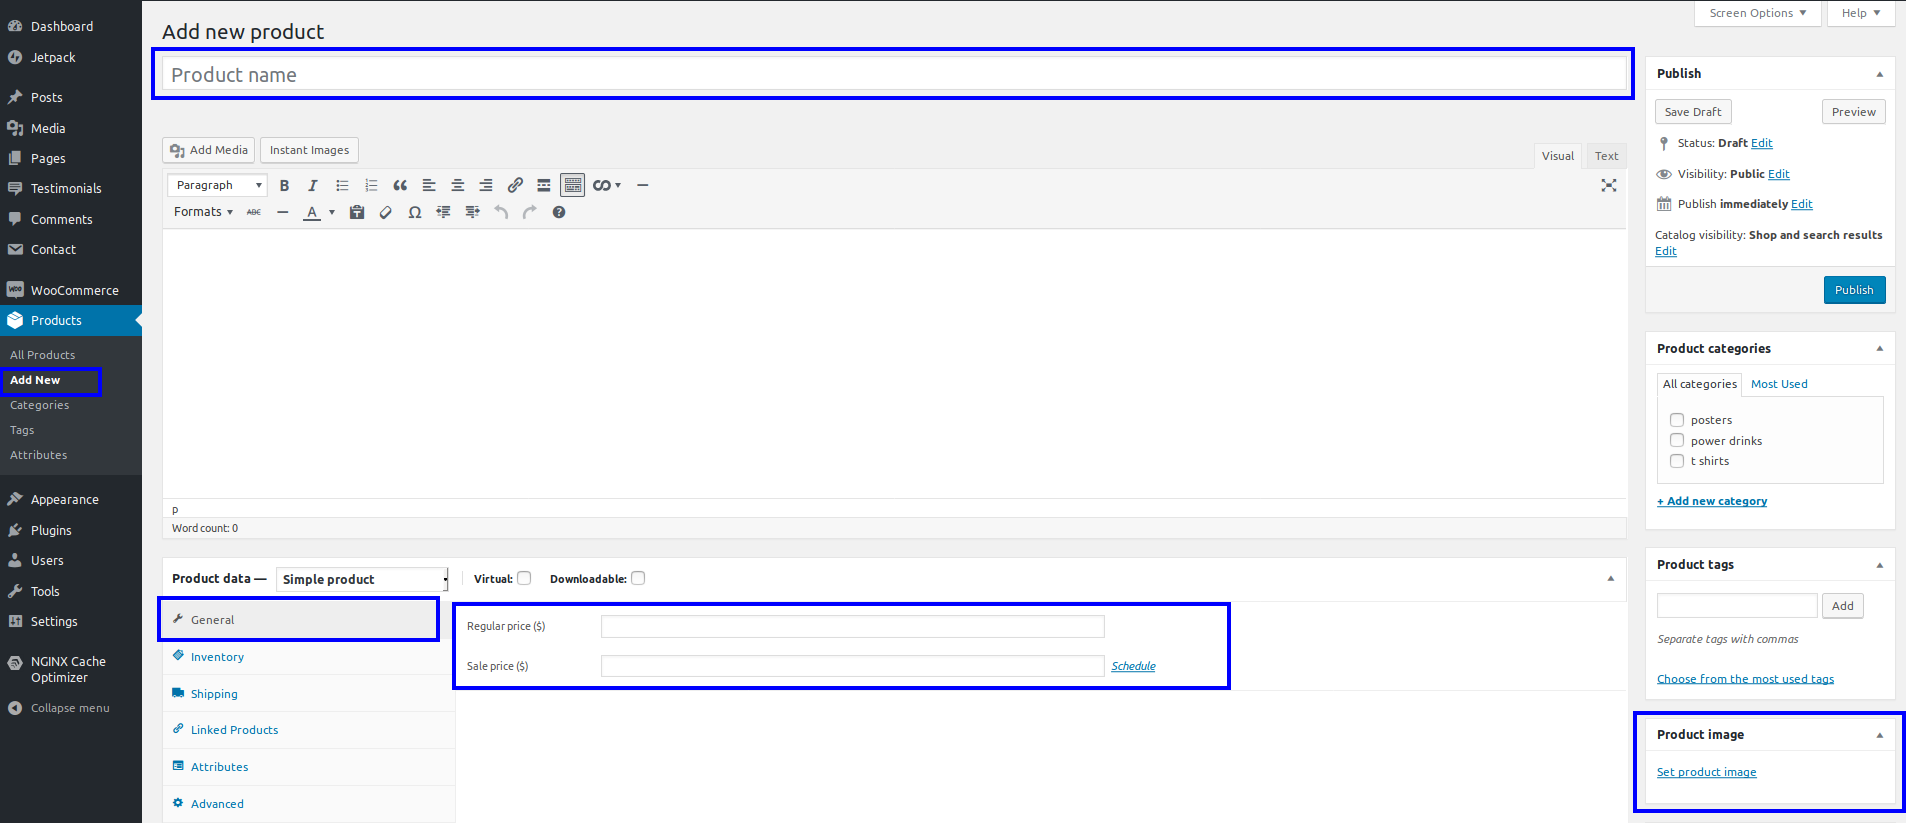
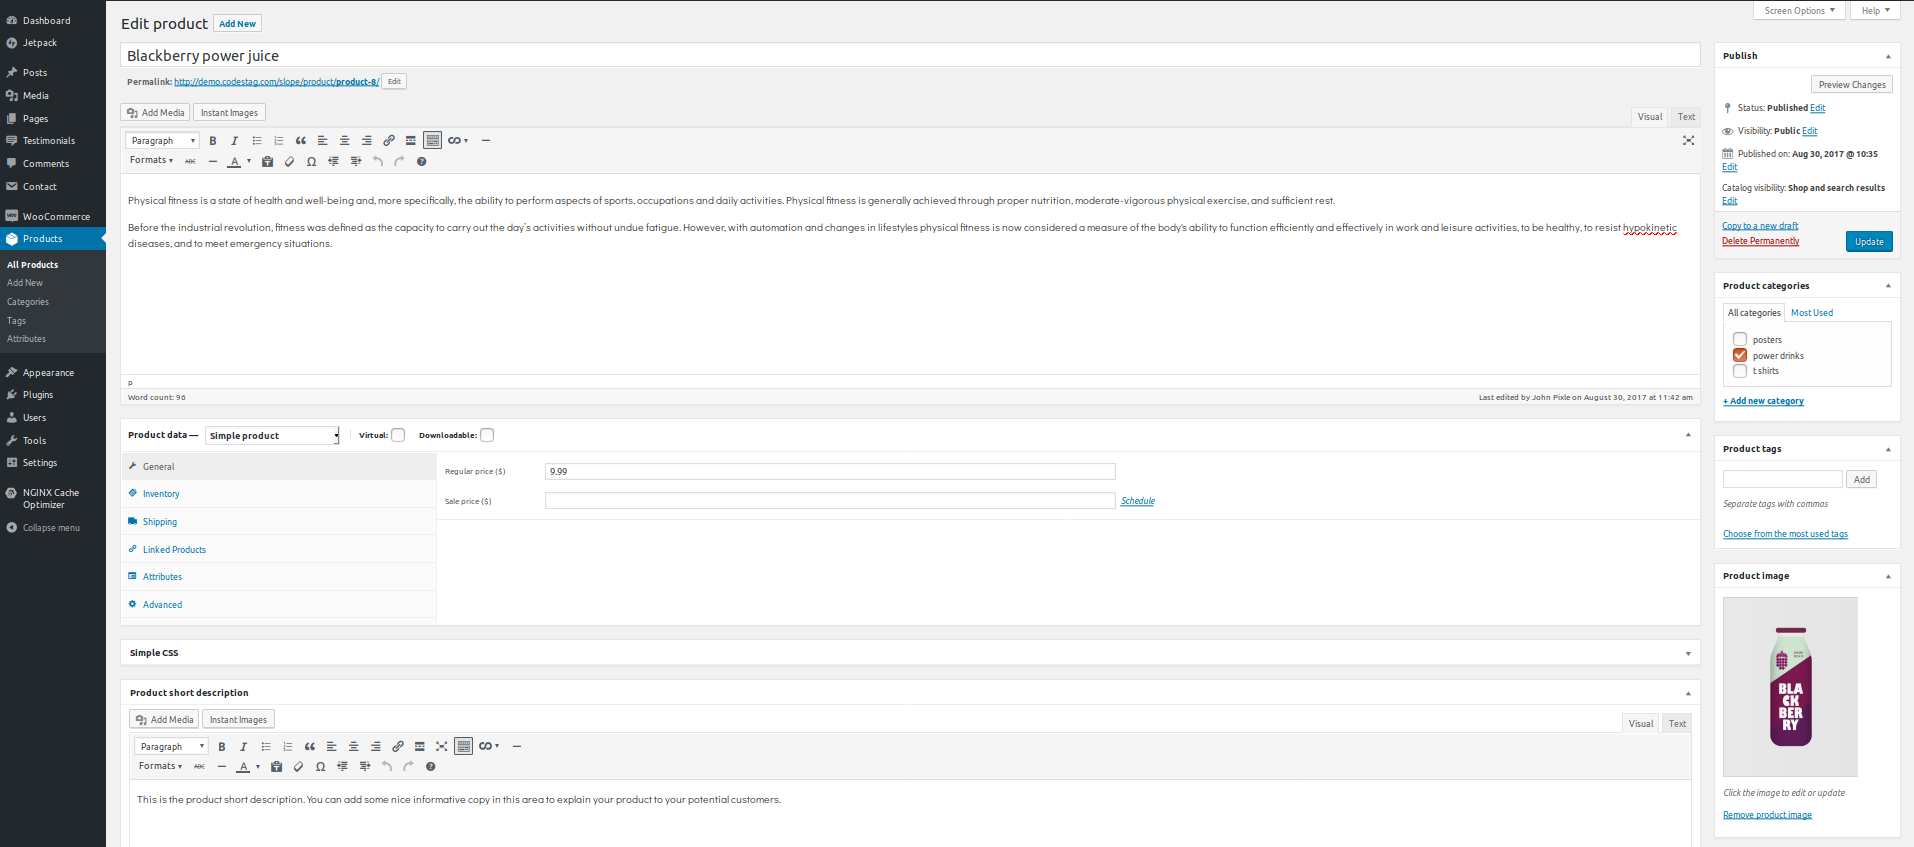
- At your Dashboard, go to Products > Add New. In the new product page, you’ll see a ton of things to edit here don’t worry you only need the Product Title, Product Description & a Product Image to get your product published.
-
After entering the product details it’ll look something like this screenshot below. Once you’re done click Publish and it’ll be live on your product shop page.
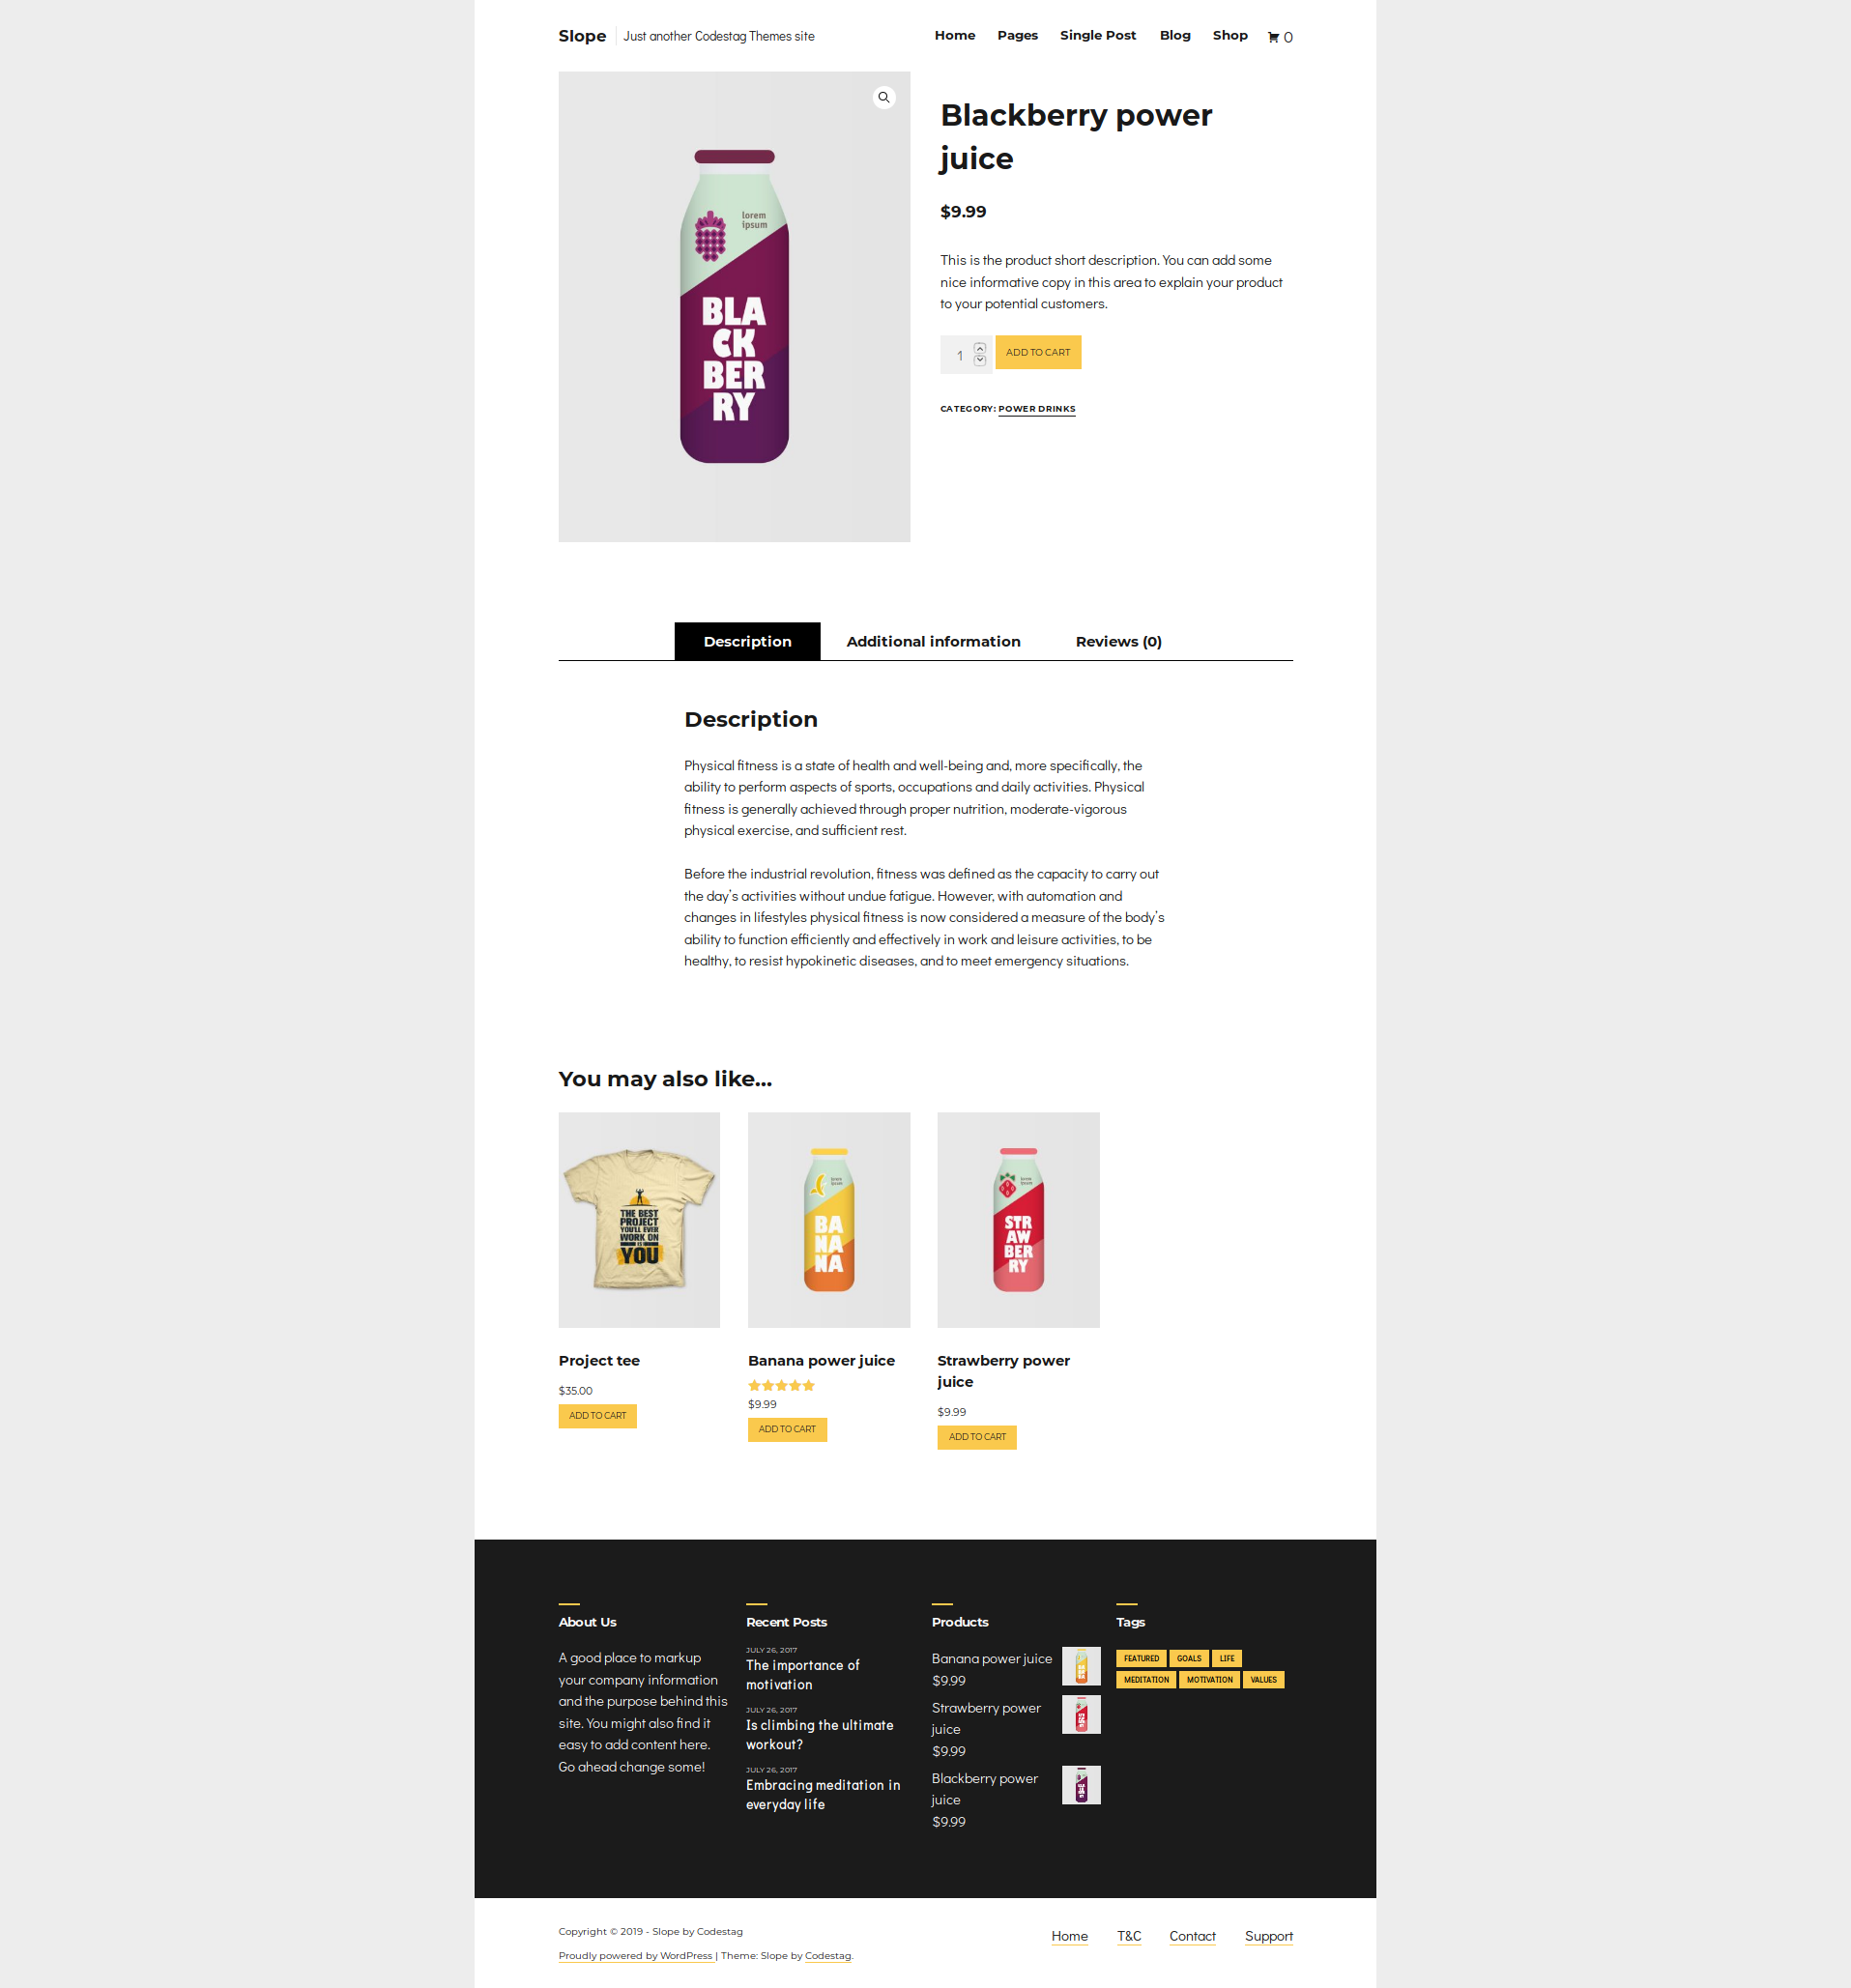
Your product page will shape up like this: