
The homepage is completely widgetized. This has tremendous advantages because you can choose what scetions/widgets will be shown, and also you can re-arrange them according to your needs. Creating a homepage similar to the demo is not difficult at all. But it requires some steps. Let’s get started, it will take you only a couple of minutes.
- 1
- First thing to do is to create a static page. Go to Pages > Add new and create a New page. Give it a suitable name like “home” and select Widgetized under templates, from the Page Attributes panel on the right. Hit Save.
- 2
- Now we have to go the the “Reading settings” and define this page as the homepage.Go to Settings > Reading and from the first set of radio buttons, check the “A Static page” and from the front page dropdown select the page you have created (in our example “home”). Click Save and you are good to go.
- 3
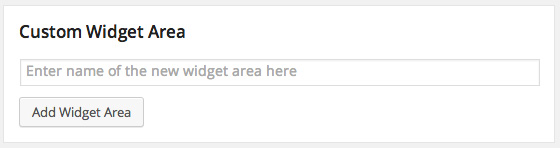
- So far we have defined that the homepage of our site will be a widgetized page named “Home”. Now the next step is to create a widget area, and decide which widgets we will use. Let’s go to Appearance>Widgets and create a Custom widget area through the panel below. Let’s give it a name like “Homepage”. Hit the “Add Widget Area button” and a new widget panel will appear. Note that this new widget panel has a shortcode.
- 4
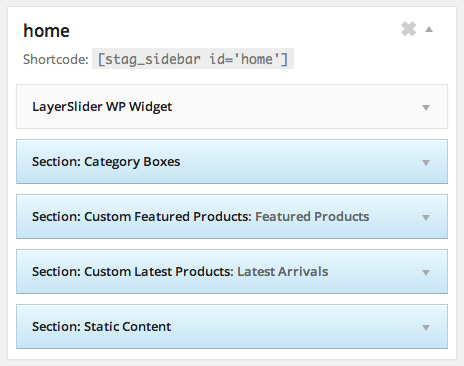
- Great, now we just need to define which of the custom widgets (sections) we need at the homepage. For the demo, we have used a widget selection as shown below. Please refer to the Custom Widgets section of this documentation, to find out what each of the widgets does, and how to set them properly.
- 5
- Last step is to go back to the static page we created as homepage a while ago. The only thing you have to do now is to paste the shortcode of the widget panel you just created, to the editor. This will output the widgets to the homepage. Hit Update and enjoy your newly created homepage.
