
- Homepage: Portfolio
- Homepage: Services
- Homepage: Latest Blog Posts
- Homepage: Static Content
- Homepage: Clients
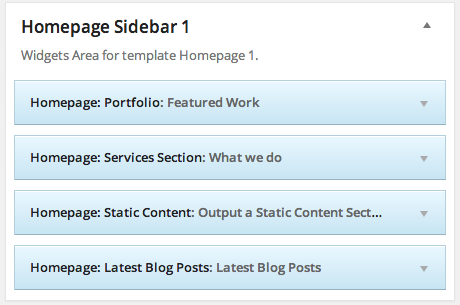
In order to create the homepage structure similar to the demo, you need to go to Appearance > Widgets and add widgets with the “Homepage:” prefix to the
“Homepage Sidebar 1” widget area.
Here is a screenshot that shows the widget configuration that is used for the demo.
Let’s see what the Homepage widgets do.
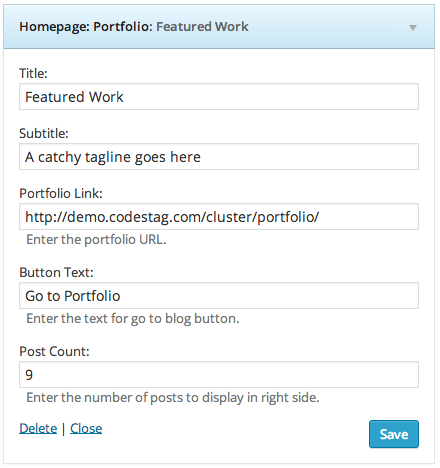
Homepage: Portfolio
Drag the Homepage: Portfolio widget to the Homepage Sidebar Panel. There you have some options as shown at the next screenshot. Under each option there is a simple description about what the option does. The descriptions are quite straightforward and you should not find difficult to set them up. The screenshot shows the current demo configuration.
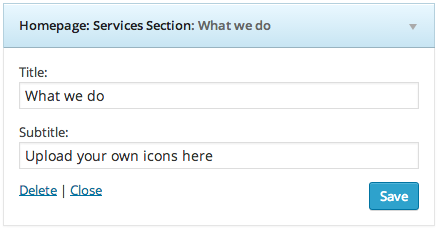
Homepage: Services
Next, let’s add a Services section. As you did previously with the portfolio widget, now drag the Homepage: Services Section at the Homepage Sidebar. Set the title and the subtitle for this section.
Notice: In order to create each of the individual service boxes, you should drag a “Services: Service Box” widget at the Services Sidebar panel.
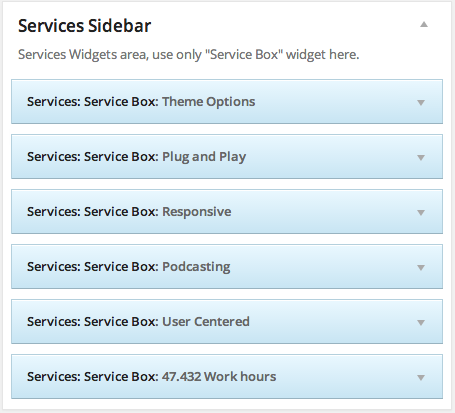
This panel defines the actual content of the Services section. In the Demo we have 6 services. If you want to use 6 too, you should drag 6 instances of the Services: Service Box widget into the Services Sidebar Panel.
For each service box you can set a title and a description. you can use one of our six available icons or upload your own icon from Media > Add New and paste the link of the icon to the Custom Icon URL field. Repeat the process for the other widgets. Make sure you hit Save after configuring each one of them.
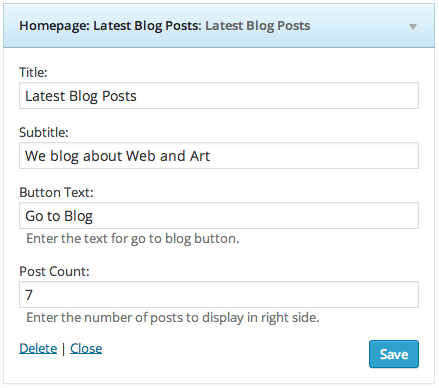
Homepage: Latest Blog Posts
Now it’s time to add the Latest Blog Posts Section. Drag the Homepage: Latest Blog Posts to the Homepage Sidebar Panel and configure the settings.
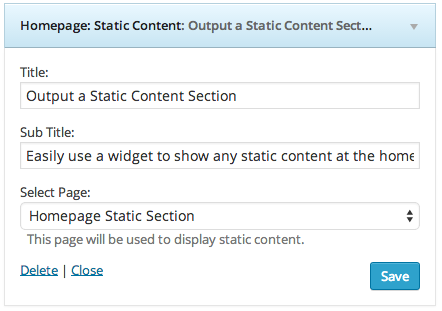
Homepage: Static Content
You Can add as many static content sections as you want at the homepage. Let’s try to add one now.
First you have to create the content at a new page. Go to Pages> Add New and create a new page. Create the content you wish and save it. Now let’s return to the widgets area. Drag the Homepage: Static Content widget to the Homepage Sidebar panel. Give the section a title and a subtitle and from the “Select page” dropdown select the page you just created. Hit save and you are good to go.
Homepage: Clients
Last, you can have a section to display client logos. First step is to upload the logos as images. Again, you can do this from
Media > Add New. The suggested dimension for each logo is 266 x 206 pixels.
Once uploaded, copy the image url for each image, and paste them at the Image URLs field at the widget.
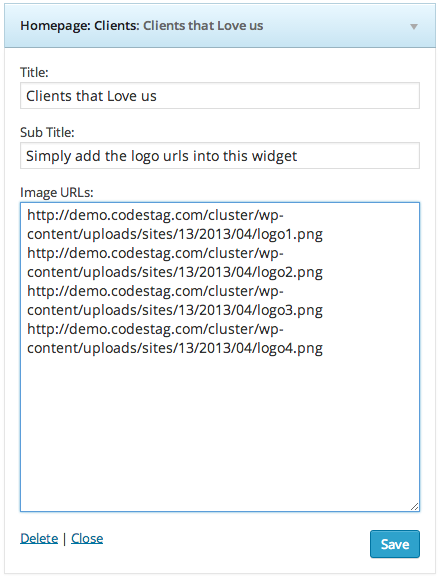
Note: You must paste one image URL per line (see screenshot above), one right after the other, without spaces or line breaks.